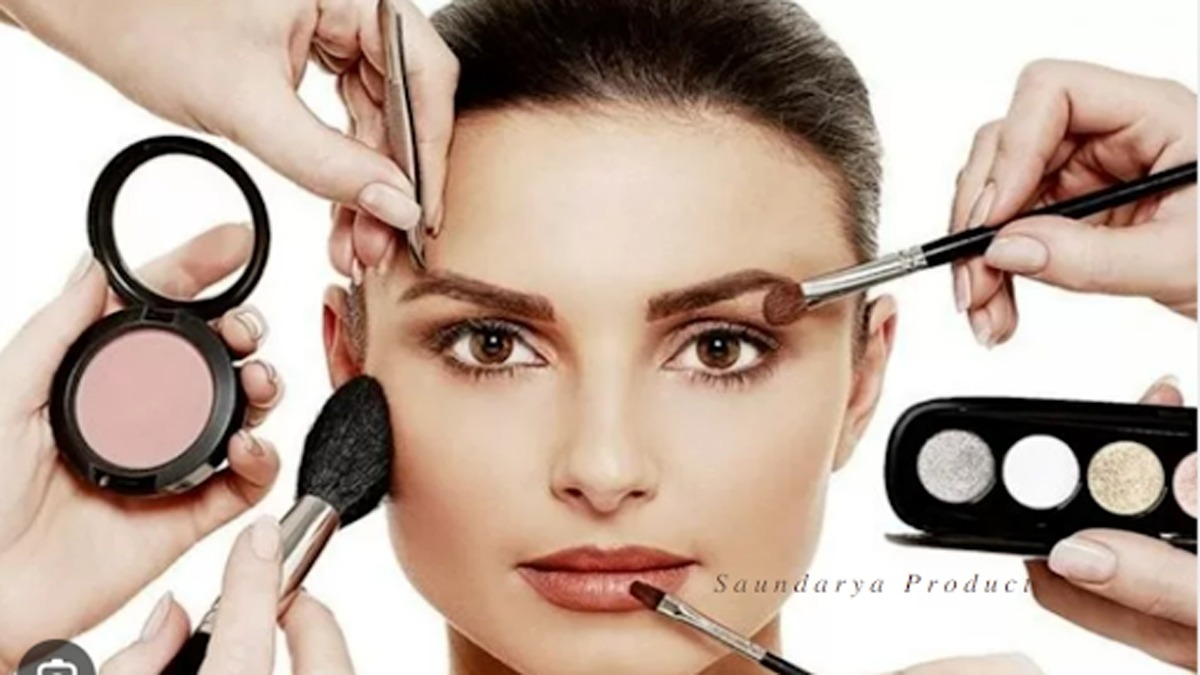
Applying makeup can seem daunting, especially if you’re starting. With so many products and techniques to learn, it’s easy to feel overwhelmed. However, learning the basic makeup steps doesn’t have to be complicated. Whether you want to apply a simple daytime look or go all out for a night on the town, following some key steps can help you create stunning looks that enhance your natural beauty. In this guide, we’ll walk you through the key makeup steps, from prepping your skin to choosing the right products and shades to techniques for applying different types of makeup. We’ve also included our top 10 must-have makeup products for beginners to help you build your makeup kit. Follow along to learn the basics to feel confident about making yourself up!
Prepping Your Skin
- The first step to great makeup application is properly prepped skin. Start by cleansing your face to remove any dirt, oil, or makeup residue. Use a gentle cleanser suited to your skin type. For drier skin, use a creamy, non-foaming cleanser. Use a foaming cleanser containing ingredients like salicylic acid to cut through oil for oiler skin.
- After cleansing, apply a toner to help restore your skin’s pH balance. Look for toners with soothing ingredients like rose water or aloe vera if you have sensitive skin.
- Apply any targeted skincare products, like serums for anti-ageing, brightening, etc. Allow them to fully absorb before moving on to the next step.
- Moisturize while your face is still slightly damp to seal in hydration. Let the moisturiser absorb completely before applying any makeup.
- Using a primer before makeup can help smooth fine lines, and even skin texture and make makeup last longer. Apply a thin layer over your face and give it a few minutes to set.
Step 1: Apply Foundation
Start your makeup with a layer of foundation to evenly cover skin imperfections like dark spots and redness for a flawless base.
Choosing the Right Foundation
Your foundation shade should match the natural skin on your neck and chest rather than just your face to avoid an obvious line of demarcation. Test shades along your jawline in natural lighting to find your best match.
Consider your skin type when choosing a foundation formula:
- Dry skin = hydrating, creamy liquid or powder foundation
- Oily/acne-prone skin = oil-free, mattifying liquid or mineral powder foundation
- Sensitive skin = non-comedogenic, fragrance-free liquid foundation or mineral makeup
Use a damp makeup sponge, stippling brush, or kabuki brush to blend foundation seamlessly onto the skin. Start applying from the center of your face in thin layers until you reach your desired coverage level. Set your liquid foundation with a translucent powder to control shine and make it last longer. Use a large fluffy brush to dust powder lightly across your whole face, avoiding heavier application under the eyes.
Step 2: Conceal Dark Circles or Blemishes
After evening out your skin tone with foundation, conceal any remaining dark under-eye circles, blemishes or acne spots using a pigmented concealer.
Choose a concealer shade slightly lighter than your natural skin tone to allow for brightening darkness rather than an exact color match. Take the concealer directly onto the back of your hand then use a small concealer brush to pick up the product before applying it to problem areas in thin layers.
Gently pat the concealer onto the skin with your ring finger to warm it and blend the product seamlessly into your face makeup. Avoid rubbing or tugging delicate under-eye skin.
Set concealer creams with a dusting of setting powder and a tapered brush for longer wear without settling into fine lines over time.
Step 3: Blush Application
Add subtle warmth and dimension back into your complexion by applying blush onto the apples of the cheeks using a blush brush.
Choose a blush shade that complements your skin’s undertones:
- Warm, yellow undertones = coral, peach, terra cotta blush
- Cool, pink undertones = soft pink, rose, berry blush
- Neutral undertones = can wear both warm and cool blush shades
Start applying your blush lightly onto the back section of your cheekbone. Sweep the colour forward while blending up towards your temple. Make sure to blend out the edges so there is no visible line where your blush stops.
To look more youthful and lifted, concentrate the majority of blush on the apples of the cheeks rather than applying heavily back towards the ear where blush can drag your face down.
Step 4: Sweep On Bronzer
Warm up and add structure to your makeup look by lightly dusting bronzer onto areas that would naturally tan when exposed to the sun – like your forehead, nose, cheeks, and chin. Use a large, fluffy powder brush to pick up a minimal amount of matte bronzer then remove any excess product on the back of your hand before lightly sweeping onto the face and neck.
Contour your cheekbones for added dimension by applying bronzer directly under your blush, following the hollows of your cheeks down towards the jawbone. Blend well to avoid any harsh lines.
Be conservative with your application to achieve a subtle, warm glow without looking over-bronzed. You can always build up intensity gradually.
Step 5: Highlight and Luminize
Strategically apply highlighter onto key areas that would naturally catch the light over the highest points of your face – like the tops of your cheekbones, above your brows, along the nose bridge, and at the cupid’s bow and chin. Liquid and cream highlighters provide the most luminosity and intense glow while powder highlighters give off a more subtle sheen.
If you have oily skin or large pores, stick to monitored powder highlighters rather than creamy formulas to avoid excess shine and clogged pores.
Sweep highlighter onto cheekbones moving upwards towards temples in a “C” shape using a small tapered brush, fingers, or damp makeup sponge for a diffused glow.
Step 6: Define Your Brows
Frame your face by filling in sparse areas of your eyebrows using light, feathery pencil strokes and brow pomade for a natural shape. Use pencil liner on the lower waterlines and rims of the eyes to define without being overly harsh before applying eyeshadow. Finish by thinly lining your upper lash line close to the lashes from the inner to outer corners using liquid or gel liner.
Apply black liner across upper lash lines for a bold definition or use dark brown liner for a softer daytime look. Extend the liner slightly thicker from the outer corners of the eyes for a subtle cat eye lift.
Keep the liner close to the lash line and thinner through the inner halves of your eyes to open up your gaze.
Always remember to tighten the liner application as you reach the inner corners of your eyes to keep the liner from transferring onto your under eyes throughout the day.
Finish your eye look by applying two coats of mascara onto your upper and lower lashes allowing each coat to dry between applications. Wiggle the mascara wand back and forth from the roots to the tips of the lashes to deposit mascara evenly without clumping.
Choose volumizing mascara for fuller lashes or lengthening formulas to extend lashes without adding bulk. Apply waterproof mascara to lock in the curl and extend wearability for a long day or event.
Step 9: Finish With Lip Color
The final step is choosing and applying lipstick or another lip color to complement your overall makeup look. Exfoliate flaky skin first with a wet washcloth or lip scrub for smooth application and longer wear time. Apply lip balm to condition and prime lips before lipstick application. For super dry lips, use an overnight treatment balm for added moisture.
Line and define your lips with pencil liner matching the shade of lipstick you’ll be applying overtop. The pencil helps prevent feathering and makes lip color last longer.
Use lip brushes for precise application or apply the lipstick directly from the tube for full, even color using less product. Blot lips between coats to build up the intensity of color gradually without getting messy.
Finish with a swipe of clear lip gloss over lipstick for added shine and plumping effects. Use nourishing lip gloss containing hyaluronic acid to hydrate dry lips all day.
Top 10 Must-Have Makeup Products for Beginners
Building your first makeup kit? Here are 10 beauty basics to get you started:
1. Tinted Moisturizer – Lightweight, easy alternative to the foundation with added skincare benefits.
2. Concealer – Spot treat dark circles or blemishes for perfected skin.
3. Mascara – Open up your eyes and define lashes by simply combing on a few coats.
4. Brow Pencil – Shape, fill, and define arches for framing your face flawlessly.
5. Blush – Pop of color for adding subtle warmth and vitality to your complexion.
6. Highlighter – Glowing sheen to enhance and sculpt cheekbones.
7. Lip Balm – Condition lips before applying color while keeping them soft and smooth.
8. Lipstick – Classic staple for adding instant color. Build your lip wardrobe.
9. Makeup Sponge – Essential tool for smooth and seamless blending.
10. Bronzer – Swipe over cheeks and temples for subtly sculpted, sunkissed dimension.
Key Takeaways
Learning makeup application basics opens up a fun, creative way to highlight your natural beauty whenever you want a confidence boost. Follow these key steps to teach yourself step-by-step:
- Prep your base well by cleansing, moisturizing, and priming
- Apply foundation for an even skin surface
- Conceal imperfections like dark circles or blemishes
- Warm up complexion with blush swept onto the apples of your cheeks
- Subtly bronze and define cheeks and temples with matte bronzer
- Highlight upper cheekbones, brow bone, and bow of lip with luminizing powders or creams
- Define and fill brows for more polished, framed eyes
- Open up eyes with soft liner pencil along lower waterlines
- Apply mascara to extend and define lashes
- Finish your look with a pop of color on your lips!
Be patient with yourself as you practice techniques. Don’t be afraid to experiment with different product formulas, tools, and color combinations to find your signature style. The more you practice playing with makeup, the more confidence, skill, and fun you’ll have creating beautiful looks.
Let us see some special brands of makeup that are very attractive with popular.
- MARS Firefly Makeup Kit with 12 Eyeshadows, Highlighter, Blusher, and Bronzer| Highly Pigmented | Free Applicator & Mirror | Eye and Face Palette for Women (26.0 gm) (Shade-2)
- Lakme Absolute Festive Limited Edition Kit
- SUGAR POP Love-Struck Beauty Set | 7-in-1 Special Kit with 4 Makeup Essentials + Pocket Perfume + Cute Hair Scrunchie + Affirmations Journal | Makeup Kit for Women Multicolour
- Lakme Marriage Bridal Complete Makeup (5 Items in the set)
- Swiss Beauty First Love Day-Night Makeup Kit with pouch | BB Foundation with SPF15, Multi-Purpose Lip Palette with 10 shades, Smudge-proof & Water-Resistant Eyeliner and Mascara | Long-Lasting | Makeup Kit for All Occasions
- Maybelline New York Makeup Kit – Waterproof Mascara, Kajal, Bold Liner + Face Mask, Girls Gotta Go Out Make-Up Kit, Eye Makeup Trio
- MARS Double Trouble Volumizing and Lengthening Mascara | 2-in-1 Mascara for Women | Long Lasting (15 ml)
- L’Oreal Paris Eyebrow Kit, Pigmented Wax and Eyebrow Powder, For Brow Shaping and Filling, 12 Hours of Wear, Brow Artist Genius Kit, Colour: Medium to Dark, 3.5g
(FAQs)
Focus first on collecting a few core brush types: A powder brush, blush brush, eyeshadow blending brush, concealer brush, and angled liner brush will create many makeup looks.
Traditionally eye makeup is applied first to avoid any shadow or liner fallout landing onto freshly applied base makeup. However, preferences vary so switch up the order to suit you.
Look for hydrating foundations, aluminizing creams with light-reflecting particles to glow instead of shimmer, cream blushes, and lipsticks to condition aging lips.
Learn your specific face shape, eye shape, and undertones to help determine the most flattering shades, product placements, and contouring techniques to enhance your features.
Steer clear of creamy, comedogenic formulas containing oils as well as heavily fragranced products that can irritate and exacerbate breakouts. Always remove makeup fully before bedtime.
Prep skin well, and allow skincare and primers to absorb fully before makeup application. Set liquid makeup with powders, use waterproof mascara, and always seal your look with a makeup setting spray for extended wear!
To achieve a flawless finish, use a foundation brush, sponge, or your fingers to evenly blend the foundation onto your skin. Make sure to choose a shade that matches your skin tone for a seamless look.
To make your lipstick last longer, consider using a lip primer, lining your lips with a lip liner, and applying your lipstick in thin layers. Blotting your lips with a tissue and setting them with translucent powder can also help.
No, you can adapt your makeup routine based on your preferences and needs. For a natural look, you may choose to skip some steps, while for special occasions, you can incorporate all the steps for a more polished appearance.
If your makeup doesn’t meet your expectations, don’t worry. You can correct mistakes with makeup remover or start over. Practice and experimentation are key to improving your makeup skills. Watching tutorials and seeking advice from professionals can also be helpful.
Popular Search term:
best mascara in india | Best Sugar Lipstick | Sugar Foundation Stick | Sugar Cosmetics Kajal | Best Sugar Eyeliners | Sugar Cosmetics Primer | Sugar Blushed | 11 of Lip Balms in India | Eye Makeup Tips |